Posts

Showing posts with the label Ostara

Nature Egg

Image
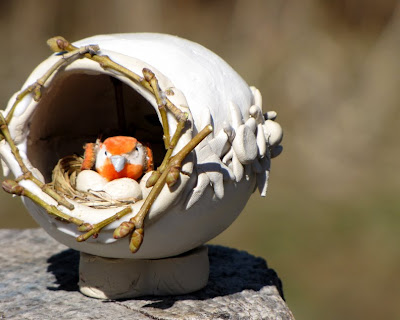
In a conversation with a friend, I told her that I wanted to make panoramic eggs. I also mentioned that I wanted to make more nature-themed ones, but that I thought it would be a silly thing to do with sugar eggs. Every since I said that, I've been thinking that I really wanted to figure out a way to do it. I used air-dry clay (mine is a natural, earth clay), grass from our yard, tacky glue, a little bird from the craft store, a couple of small snips from a bush (with earliest spring buds), and a large, plastic easter egg. If you have egg molds, or a shell that opens length-wise instead of across - lucky you! Use these halves for molds. If you have the regular eggs that open into the top and bottom half of the eggs, then you can still use it, with some care and patience. First I taped the plastic egg together, so I wouldn't squeeze it apart. For the egg shape, I just pressed bits of clay onto the entire egg. When I felt it was covered evenly, I gen...
Paper Birds

Image
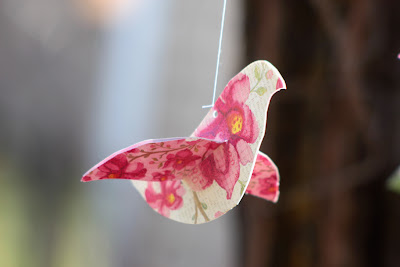
I've had this thing for pretty papers, lately.  I'm sort of.... collecting them.  :)  Imagine how thrilled I was a couple of weeks ago when I started buying ones colored and patterned by Spring! This morning Maddie and I played with birds. We both made a template out of construction paper, then traced that onto the pretty stuff. We chose another color for wings, then I slit a hole inside the bird's body, and in went the wings.... and a tail for some. We used a small holepunch, and added thread. Hooray for cheerful and bright!

Spring Fence Basket

Image
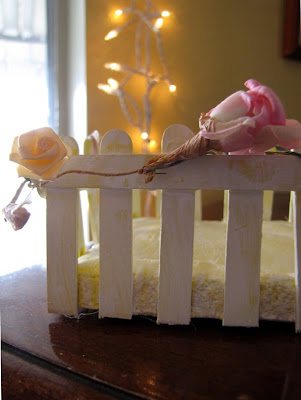
This post was originally posted on my blog Ordinary Life Magic. These little boxes are perfect for holding found spring treasures, or for colored eggs, to welcome Ostara. I have a wooden box that I purchased that looks like a fence. Every since I bought it, I've been thinking on how we could make one... I think handmade ones would be darling on the spring nature table. I picture them holding painted eggs or little nests, pretty rocks, bits of moss... whatever we find during our springtime nature travels. Our materials were popsicle sticks (craft sticks, if you insist), paint, hot glue, craft glue, salt, flour, and flowers. Our tools were a glue gun, sponge (for painting), and wire cutters. First we cut popsicle sticks in half with the wire cutters. Ours went flying, so be warned. Maddie had fun collecting them. Lay them out the width of a whole popsicle stick, and use a stick to line up the bottoms. We used five or six 1/2 sticks per side. Place a dot of craft glue o...

Making Paper

Image
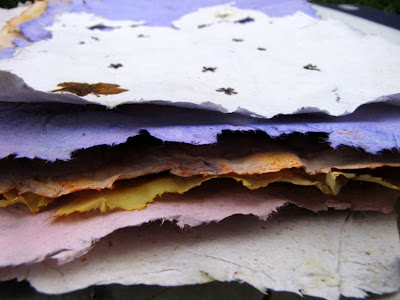
Oh, I've wanted to make paper for the longest time! I bought a book like fifteen plus years ago, and had never done it. What a lovely process. Yesterday Maddie and I went through her paper box, and tore up copy paper that had been drawn on (both sides), and a few coloring book pages that were in there, as well. We put our bits in a five gallon bucket, and set it in the bathtub, and filled it maybe a third of the way with hot water. We let the paper soak for three or four hours, then we dumped paper and water into our blender, blending it into tiny bits. When the blender got stuck, we just added more water. As the batches finished blending, we poured each one into a large , shallow box. When all of the paper that we had soaked had been pureed, we stirred it up with our hands. I dipped our smallest screen into the plastic box, and then swished the fibers over the screen. When it looked like it was full, we lifted the screen straight up, and set it on the edge of the box to ...

Grass Heads

Image
I love these supercute soggy creatures. And what an excellent way to look forward to Ostara, in a few weeks! You only need socks, burlap, or some other loosely woven cloth , some sort of grass seed , a rubberband or twist tie , buttons , pins , and soil . Open your sock or material over the rim of a mug, and put in the seeds. Next add your soil, pushing it in firmly. Twist the opening to tighten, lifting it out of your mug, and tie it with the rubberband or the twisty. Trim off the excess material and water thoroughly. Turn it over, and shape your creature how you like, and add your eyes and nose. Keep it on a saucer or plate with water in the dish so that your seedlings won't dry out. Soon you'll have hair! This craft idea comes from Usborne Big Book of Things to Do .

Spring Stones

Image
Here's a pretty one for your favorite rock collector. First came some lovely glass stones. Though the stones came with a sign that said they were just waiting to be painted, I knew they begged something else. I found just the thing. We selected a stone, and then found just the bit of paper for that particular shape and size. Holding the stone carefully and firmly to the paper, I cut on an inward angle around the stone. After carefully placing the stone down on the table, maintaining the same angle, we brushed the paper with a glue/water mixture. We placed the paper against the bottom of the stone, and worked it thoroughly around the stone, up the edges a bit, and pressed firmly throughout the bottom of the stone. So, so, so pretty. And they feel as lovely as they look! They could be made into magnets, or a lovely nature game... but for now they'll just sit on a nature table or our Spring altar, being touched and admired. Happy Sp...