Posts

Showing posts with the label With Children

Paper Birds

Image
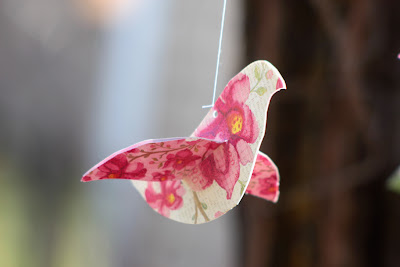
I've had this thing for pretty papers, lately.  I'm sort of.... collecting them.  :)  Imagine how thrilled I was a couple of weeks ago when I started buying ones colored and patterned by Spring! This morning Maddie and I played with birds. We both made a template out of construction paper, then traced that onto the pretty stuff. We chose another color for wings, then I slit a hole inside the bird's body, and in went the wings.... and a tail for some. We used a small holepunch, and added thread. Hooray for cheerful and bright!
Beaded Bowl

Image
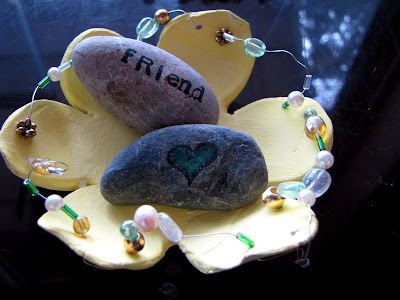
This was originally posted on my blog Ordinary Life Magic .  Another pretty project to chase away the winter blues! We made a beaded bowl today. We're all about spring pretties in these last (let's hope) cold and gray days of winter. First we rolled out a 1/2 inch or so thick bit of air-dry clay. We cut it with a flower cookie cutter, then picked it up and placed it on a piece of plastic, and rolled it out just a bit more, so it would be bigger. We placed it over a rounded bowl, and put it in the oven on the lowest setting for an hour or a little longer. When it was somewhat firm, we took it out of the oven, and carefully pried it off of the mold. We painted our bowl with acrylic paint, and let that dry for a little while. I got out some small, malleable wire and a needle, and after poking a hole with the needle, I set the wire through the hole. (Very carefully - the clay isn't dry yet, to allow for easy beading.) I wrapped the end around the edge of the bowl, and r...

Quilling with Children

Image
We've been under snow for months, and I think some color spread throughout our home might be just the thing to remind us that Spring really is coming! Our bird is on a wet-on-wet watercolor painting . Quite a while ago we made a beautiful paper art project . This time we're doing details. For this project you'll need paints if you like, any kind of paper (for quilling, we used actual quilling paper, patterned scrapbooking, construction, and regular printer varieties of paper), glue , scissors , and a quilling tool - you can use an actual quill, if you like, or even a pencil or wooden skewer, but I had the idea today of using an extra large embroidery needle as a tool -- it worked beautifully for little hands. For making the paper strips, first you need to find out which way the paper fibers lie... tear a strip off the paper (around an inch thick will be a good indication). If the tearing line curves, then try tearing it the other way. Following th...

Spring Fence Basket

Image
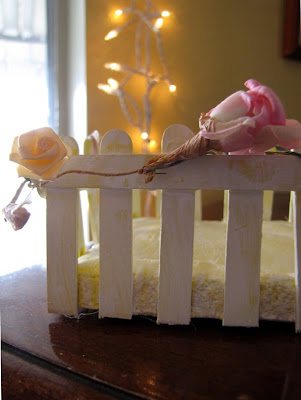
This post was originally posted on my blog Ordinary Life Magic. These little boxes are perfect for holding found spring treasures, or for colored eggs, to welcome Ostara. I have a wooden box that I purchased that looks like a fence. Every since I bought it, I've been thinking on how we could make one... I think handmade ones would be darling on the spring nature table. I picture them holding painted eggs or little nests, pretty rocks, bits of moss... whatever we find during our springtime nature travels. Our materials were popsicle sticks (craft sticks, if you insist), paint, hot glue, craft glue, salt, flour, and flowers. Our tools were a glue gun, sponge (for painting), and wire cutters. First we cut popsicle sticks in half with the wire cutters. Ours went flying, so be warned. Maddie had fun collecting them. Lay them out the width of a whole popsicle stick, and use a stick to line up the bottoms. We used five or six 1/2 sticks per side. Place a dot of craft glue o...

Making Paper

Image
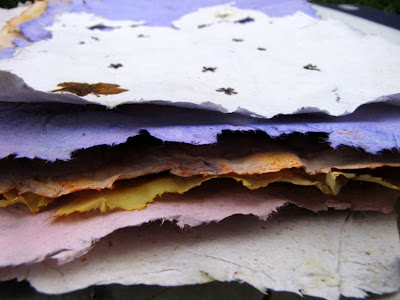
Oh, I've wanted to make paper for the longest time! I bought a book like fifteen plus years ago, and had never done it. What a lovely process. Yesterday Maddie and I went through her paper box, and tore up copy paper that had been drawn on (both sides), and a few coloring book pages that were in there, as well. We put our bits in a five gallon bucket, and set it in the bathtub, and filled it maybe a third of the way with hot water. We let the paper soak for three or four hours, then we dumped paper and water into our blender, blending it into tiny bits. When the blender got stuck, we just added more water. As the batches finished blending, we poured each one into a large , shallow box. When all of the paper that we had soaked had been pureed, we stirred it up with our hands. I dipped our smallest screen into the plastic box, and then swished the fibers over the screen. When it looked like it was full, we lifted the screen straight up, and set it on the edge of the box to ...

Ice Lanterns

Image
I think this is one of my very favorite projects. How could it not be? We try to do it every year for Solstice, but the weather doesn't always comply! You'll need small and large containers, cold, something heavy, and bits from nature. The Gathering is a favorite part, to be sure. For the containers, you can use buckets, the bottoms of orange juice or milk cartons, bowls... whatever you have on hand-- just make sure there are no ripples or any lines to keep your ice from flowing freely out of the container. Place your small container inside your large one, and then between the two place your pretties- evergreens, rosehips, glitters if you like, pine, berries... Weigh down your inner container with something heavy (rocks, marbles, whatever) and then pour water into your outside container. Set them outside to freeze. When they're frozen throughout (possibly it will take 24 hours), bring them in and empty your inner container of its weights, th...